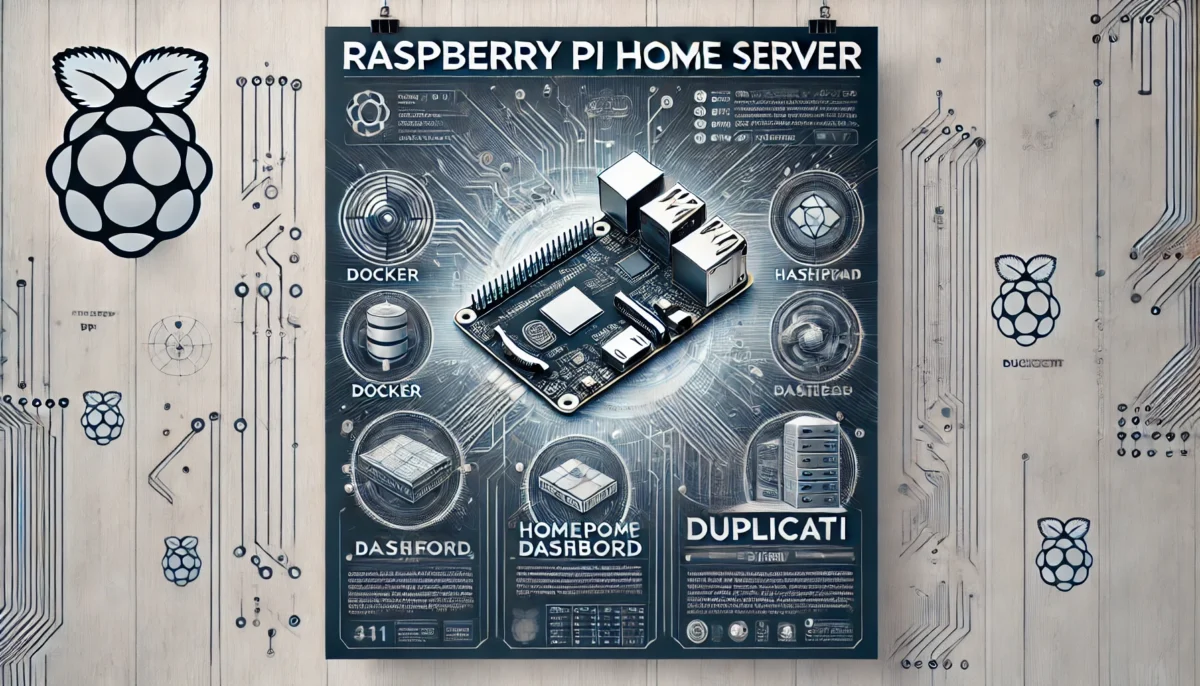
(with Docker, Portainer, Duplicati and Homepage dashboard)
In this article, I will provide a detailed guide on how to set up a home server on a Raspberry Pi, install Docker and Portainer, and create a home webpage (dashboard) for easy access to all the services you may want to add in the future. I will also show you how to set up automatic data backups using Duplicati. This configuration is a convenient starting template for a home server, which can be easily expanded by adding the services you need using Docker containers.
What You’ll Need
- Raspberry Pi: I used Raspberry Pi 3 and 4 for this article, Raspberry Pi 5 is also a great choice. You can use other models as well, but there might be differences in selecting the operating system and storage.
- Raspberry Pi Case (optional): The choice of case is entirely up to you but if you want my recommendation – I prefer cases with passive cooling (no fan, no noise, and less risk of overheating if the fan fails, plus slightly lower power consumption).
Check the cases with passive cooling on AliExpress (affiliate links):
For Raspberry Pi3 – Link
For Raspberry PI4 – Link
For Raspberry PI5 – Link
Below is a photo of the case I’m using.

- Storage Device: An SSD or MicroSD card with at least 8GB of space. If you are using a Raspberry Pi 4 or 5, I recommend using an SSD to fully utilize their potential. A USB SSD is the most convenient option, but you can also connect a SATA or NVMe drive using an adapter for Raspberry Pi. I use an eVtran v26s USB SSD MLC drive purchased on Aliexpress (shown below), which looks like a regular USB flash drive in a metal case but is a full-fledged SSD with MLC memory, which is much more durable than the widely used TLC memory, making it ideal for a server. You can even buy a similar drive with SLC memory which is even more durable than MLC, check for example in this store (AliExpress affiliate link).

- Power Supply: For Raspberry Pi 4/5, I recommend using the official power supply to ensure sufficient power. If you have a Raspberry Pi 3/Zero/Zero2, you can use any third-party 5V power supply with 1.5A – 2A output, such as a phone or tablet charger with a microUSB connector.
- Computer or Laptop: For the initial setup of the home server.
Let’s Get Started
Installing the Raspbian Operating System
- Download Raspberry Pi Imager
Go to the official Raspberry website (link) and download the Raspberry Pi Imager. Install this utility on your computer. - Prepare the Storage Device
Connect the SSD or MicroSD card to your computer. This storage will be used for loading the operating system for our Raspberry Pi server, as well as storing all server data. - Install the OS
Launch the Raspberry Pi Imager and select the connected storage device. Make sure to select the correct one, as all data on it will be erased. Choose the OS: first select Raspberry Pi OS (other), then, if you have a Raspberry Pi 3/4/5, choose Raspberry Pi OS Lite (64-bit); for other models, select Raspberry Pi OS Lite (32-bit). Click NEXT.

- Custom Settings
- Click
EDIT SETTINGSto configure custom settings:- Hostname:
rpiserver - Username/Password: For example,
craic/diycraic - Configure Wireless LAN: If you can connect the server to your home network via Ethernet, you can skip this option. Wired connection is more reliable and faster.
- Enable SSH: Turn this on to allow remote access to the server using any SSH client (e.g., Putty).
- Hostname:
- Save the settings.
- Click


- Write the OS to the Storage Device
After applying the saved settings, confirm that you agree to erase all data on the selected storage. Wait for the process to complete, then safely remove the storage device. It’s now ready to be inserted into the Raspberry Pi and used to boot the operating system.
First Boot of the Server
Insert your storage device with the operating system into the Raspberry Pi. If possible, connect it to the home network via Ethernet cable (e.g., to your router); if not, the Raspberry Pi will connect via Wi-Fi according to the configuration set in the previous step. Connect the power supply and turn it on. It might take up to 5 minutes for the first boot.
Accessing the Server via SSH
Since the server does not have a display or keyboard, we need to connect to it remotely for further configuration. We will use an SSH client from another computer or laptop on the same home network. As you may remember, during the OS configuration in Raspberry Pi Imager, we set the hostname: rpiserver.local. To check network access to the server, we can run the command ping rpiserver.local (in Windows, press Windows Key + R and paste the command; in macOS or Linux, use the terminal). If you get a response, the server is booted and connected to the network, and you can use an SSH client; if not, you may need to wait a bit as the first server boot can take a few more minutes.

- Connecting via SSH
In Windows, the easiest SSH client to use is Putty (link). Download and launch it. Enter the hostnamerpiserver.localand port22. To avoid entering this each time, you can name the session and click Save, so it will appear in the list next time. Click Open. On the first connection, you will likely see a security confirmation dialog, which you should confirm. You should then see a terminal prompting for a login and password. Enter the login"craic"and password"diycraic"(or the credentials you set during OS configuration in Raspberry Pi Imager). After a successful login, you will gain access to the server terminal. - Updating Raspbian
Even though we installed the latest available version of Raspbian, some components may already be outdated, so it is advisable to update to the latest versions. Run the following command in the terminal:
sudo apt update && sudo apt full-upgrade -y- Reboot
After the update is complete, it’s advisable to reboot:
sudo rebootAfter a few minutes, you can reconnect via SSH and continue.
Installing Docker
- Install Docker
Execute the following commands sequentially:
sudo install -m 0755 -d /etc/apt/keyringssudo curl -fsSL https://download.docker.com/linux/debian/gpg -o /etc/apt/keyrings/docker.ascsudo chmod a+r /etc/apt/keyrings/docker.ascecho \
"deb [arch=$(dpkg --print-architecture) signed-by=/etc/apt/keyrings/docker.asc] https://download.docker.com/linux/debian \
$(. /etc/os-release && echo "$VERSION_CODENAME") stable" | \
sudo tee /etc/apt/sources.list.d/docker.list > /dev/nullsudo apt-get updatesudo apt-get install docker-ce docker-ce-cli containerd.io docker-buildx-plugin docker-compose-plugin -y- Verify Installation
To verify the installation, run the command:
sudo docker run hello-worldIf everything went well, you should see a message like this:

If something didn’t work, check the detailed instructions here: Docker Install on Debian.
- Create Directories for Data and Backups
We’ll need two directories on our server later: one to store the current data (homeserver) for our Docker containers and another (backups) to save backups of the first one. Let’s create them now:
cd /
mkdir homeserver
mkdir backupsInstalling Portainer
- Set Up Portainer
Run the following commands:
sudo docker volume create portainer_datadocker run -d -p 8000:8000 -p 9443:9443 -p 9000:9000 --name portainer --restart=always -v /var/run/docker.sock:/var/run/docker.sock -v portainer_data:/data portainer/portainer-ce:2.21.4For more detailed info use Portainer Documentation
- Access Portainer
If successful, you can now open the Portainer configuration page in your browser by entering:
http://rpiserver.local:9000 (HTTP) or https://rpiserver.local:9443 (HTTPS)
If the browser warns about an insecure connection for HTTPS, simply agree and choose to continue.
- Create an Account
You will then reach the account creation page. Enter a username, e.g., craic, and a password, e.g., diycraic1234. Click “Get Started”


- View Containers
Now you can open the Containers section and see two containers: Portainer itself and Hello World, which we installed when checking Docker’s functionality. You can delete Hello World from the system now.

Installing the Duplicati Container
- Add a New Stack
Go to the Stacks section in Portainer and add a new stack (add stack). In the name field, type “duplicati”. In the Web Editor, add the following:
services:
  duplicati:
    image: lscr.io/linuxserver/duplicati:latest
    container_name: duplicati
    environment:
      - PUID=0
      - PGID=0
      - TZ=Etc/UTC  #change to your timezone if different
    volumes:
      - /homeserver/duplicati/config:/config  #path to duplicati config folder
      - /backups/duplicati:/backups  #path to duplicati backup folder
      - /homeserver:/homeserver  #path to homeserver folder
    ports:
      - 8200:8200
restart: unless-stoppedClick “Deploy Stack” in the bottom of the page and wait for the process to complete. After it’s finished, Duplicati configuration webpage should be available at:
http://rpiserver.local:8200
We will configure backups later. For now, let’s add another container for the Homepage so we have something to back up.
Installing the Homepage (Dashboard)
- Add the Homepage Container
Create a new stack named “homepage”

add the following in the Web Editor:
services:
  homepage:
    image: ghcr.io/gethomepage/homepage:latest
    container_name: homepage
    ports:
      - 3000:3000
    volumes:
      - /homeserver/homepage/config:/app/config
      - /var/run/docker.sock:/var/run/docker.sock
restart: unless-stoppedClick “Deploy Stack” and wait for the process to complete. After installation, the webpage should be available at:
http://rpiserver.local:3000
You should see something like this:

- Add Links to Portainer and Duplicati
To do this, we need to edit theservices.yamlfile in the/homeserver/homepage/configfolder. In the SSH terminal, run:
sudo nano /homeserver/homepage/config/services.yamlReplace the text with the following:
- Home Server:
    - Portainer:
        href: http://rpiserver.local:9000
        description: Docker Containers Management Tool
        icon: portainer
        server: homeserver-docker
        container: portainer

    - Duplicati:
        href: http://rpiserver.local:8200
        description: Backup Management Tool
        icon: duplicati
        server: homeserver-docker
        container: duplicati

- Other Services:
    - My Second Service:
        href: http://localhost/
description: Homepage is the bestSave the file (Ctrl+x, then y, and Enter). The “server” parameter indicates the name of the Docker server, which we should set in the docker.yaml configuration file.
Run the command:
sudo nano /homeserver/homepage/config/docker.yamlAnd replace the content with:
homeserver-docker:
socket: /var/run/docker.sockSave the file (Ctrl+x, then y, and Enter).
- Refresh the Homepage
Update the webpage, and you should see the added links to Portainer and Duplicati. Now, clicking on these links will open the respective services. This is the most basic configuration of Homepage; for more advanced settings, refer to the documentation at gethomepage.dev.

- Resolving Missing Memory Stats (optional)
When you click the “Running” button on the container tile, it displays the container’s resource usage. However, on a Raspberry Pi, the memory stats are not always shown by default. The same issue occurs when you rundocker statsin an SSH terminal—the memory usage stats are missing and show 0.00%. This can be frustrating if you want to monitor the memory usage of your containers to ensure they are not consuming too much memory.

This issue arises because, by default, cgroups memory accounting—a Linux kernel feature used by Docker to track resource allocation—might be disabled on your Raspberry Pi OS. To enable it, you need to edit the file /boot/firmware/cmdline.txt and add the following option to the end of the file:
cgroup_enable=cpuset cgroup_enable=memory cgroup_memory=1You can do this by running the following command:
sudo nano /boot/firmware/cmdline.txtEdit and save the file, then reboot the Raspberry Pi. After rebooting you should see the memory usage:

Configuring Automatic Backups with Duplicati
- Access Duplicati
In the previous section, we set up the Homepage dashboard and modified its configuration by adding links to our services. Similarly, you can add other services using Docker containers, change their settings, add your content, and so on. I recommend storing the configurations and data for all added containers in one place, such as in the/homeserver/container_namedirectories, which will make it convenient to set up automatic backups of the/homeserverdirectory and periodically copy the configurations and data of all installed containers. If something goes wrong, we can easily restore our services data. - Create a Backup
Let’s set up a backup of the/homeserverfolder using Duplicati. Go to our Homepage:
http://rpiserver.local:3000 and click on the Duplicati link (or open it directly at http://rpiserver.local:8200).
- On the first run, Duplicati will prompt you to set a password to protect access to the service, which you can do at your discretion.
- Then, open “Add Backup” and click Next.
- Enter a backup name, e.g., Homeserver. You can use encryption with a password if desired, or select “No Encryption.” Click Next.


- Choose Backup Destination
Next, we need to choose where to save our backups. For simplicity, we’ll save to the local folder/backups/duplicati, which we created when configuring the Duplicati container (see #path to duplicati backup folder). However, note that in addition to saving backups in a local folder, Duplicati supports a wide range of protocols and cloud services. I, for example, save my backups to a Synology NAS via FTP, but you can also use Google Drive, Microsoft OneDrive, Dropbox, etc.—just click on the “Storage Type” dropdown and see the full list. For now, select the local backups folder and click Next.

- Select Data to Backup
Now we need to choose which directory to back up. Select Computer -> Homeserver and click Next.

- Set Backup Schedule
You’ll then be prompted to select how often and when to back up the data. For example, I chose to back up the data at 4 am three times a week. Click Next.

- Configure Backup Options
Next, we need to choose the maximum file size for the archive; if the backup exceeds the set size, it will be split into several files according to the set limit. We also need to choose how long to keep backups. For example, I selected a maximum size of 2 GB and to keep 10 backups. Choose according to your preference. Click Save.

- Test the Backup
Next, we need to choose the maximum file size for the archive; if the backup exceeds the set size, it will be split into several files according to the set limit. We also need to choose how long to keep backups. For example, I selected a maximum size of 2 GB and to keep 10 backups. Choose according to your preference. Click Save.


Restoring Data with Duplicati
Restoring the data of one or more Docker containers is very simple. To do this, go to the Restore section and choose where to restore from—our Homeserver will be the last item. Click Next.

Then we need to select the date of the backup and which folders to restore. For example, let’s choose Homepage:

It’s worth noting here that it’s better to select only the folders you really need to restore at the moment, and it’s advisable to uncheck Duplicati, as this will overwrite Duplicati’s own data during the backup restoration, and it’s unclear how it will behave. Click “Continue,” leave the default settings on the next screen, click “Restore,” and wait for the process to complete. That’s it; we successfully restored the Homepage container data. Convenient, isn’t it?
Conclusion
Now you have a fully configured home server with a homepage (dashboard) where you can easily add services using Docker containers, along with a system for backing up and restoring data.
I used this setup on my home server, running on a Raspberry Pi 4 (8GB), for several years. It handled 17 containers seamlessly, including the WordPress container hosting the this website where you’re reading this tutorial🙂. However, I recently upgraded to an N100-based mini PC to gain more RAM, as I wanted to run Home Assistant in a dedicated virtual machine. On the N100, I also now host a local voice assistant (Vosk) with an advanced LLM model for voice recognition, which requires significant RAM. If Docker containers are sufficient for your needs, I’d recommend sticking with a Raspberry Pi-based server. Otherwise, check out my review of the N100 mini PC as a home server alternative.
Stay Updated
If you enjoyed this tutorial, follow us on social media (links in the website footer) to stay updated on similar DIY projects in the future.

Thank you Brother. Really Helped alot.
Stay Healthy
This article covered everything I needed to know.
Really appreciate the thoroughness.
I enjoy what you guys tend to be up too. This type of clever work and exposure!
Keep up the fantastic works guys I’ve you guys to my
blogroll.